Passkeys in practice: Coinbase Smart Wallet


Recently we reviewed the ABCs of crypto wallet security for traditional noncustodial wallets. But there’s a new wave of wallets in town: smart wallets accessed via passkey. The point of passkeys is to make security less of a headache, and mostly the solution works. You should still know what you’re doing, because there are still ways to mess up. It wouldn’t be crypto without the potential to accidentally screw yourself 😊 (Someday that won’t be the case, and smart wallets are a big improvement.)
Let’s walk through creating a Coinbase Smart Wallet, with an eye to keeping the funds in it safe. Coinbase’s work in this arena is state of the art, thus a perfect example. The pitch is pretty compelling:
Smart wallets live in your browser, no extensions or app installs needed. Use passkeys for signing, with enterprise-grade security without complex seed phrases. One wallet, one address, works universally across major L2s and onchain apps.
Sounds great! First let’s sign up at https://wallet.coinbase.com/smart-wallet. Click the button that says “Create a smart wallet,” which triggers a pop-up modal, then click “Sign up.” Now things start to get interesting:
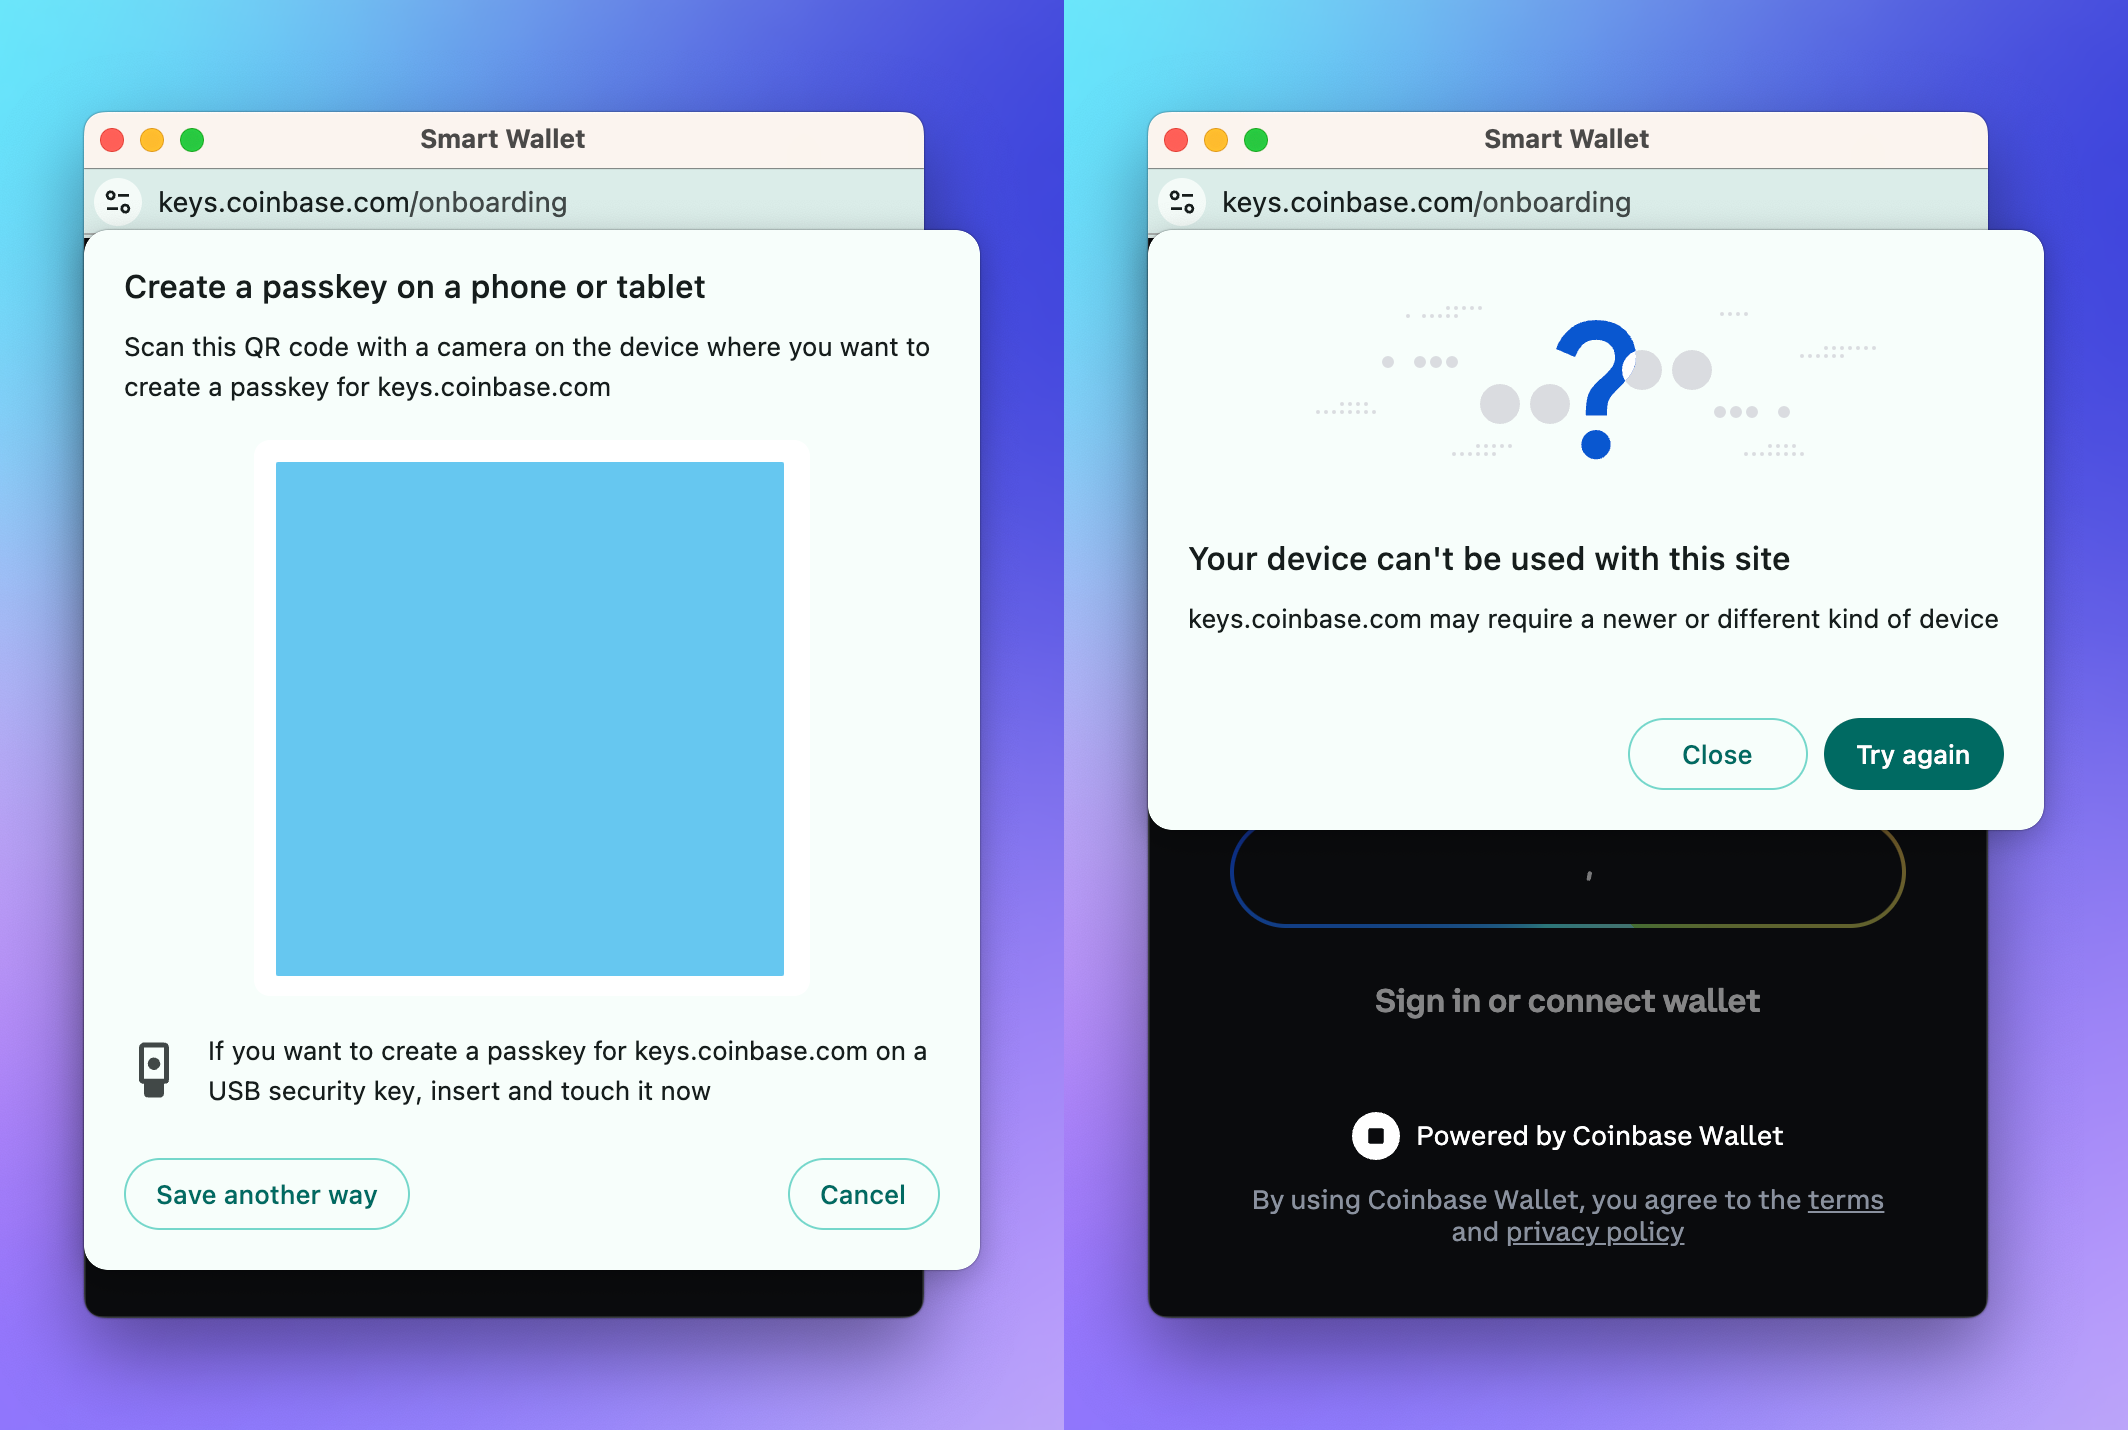
My first choice for creating a passkey was a YubiKey, but I guess mine is too old and Coinbase wouldn’t accept it. Hmm, never mind, I’ll try my phone. That errored out inexplicably (I do have an older iPhone, but I’ve created passkeys on my phone before, so I don’t know what the issue was). Whatever, I’ll use a Chrome passkey instead:
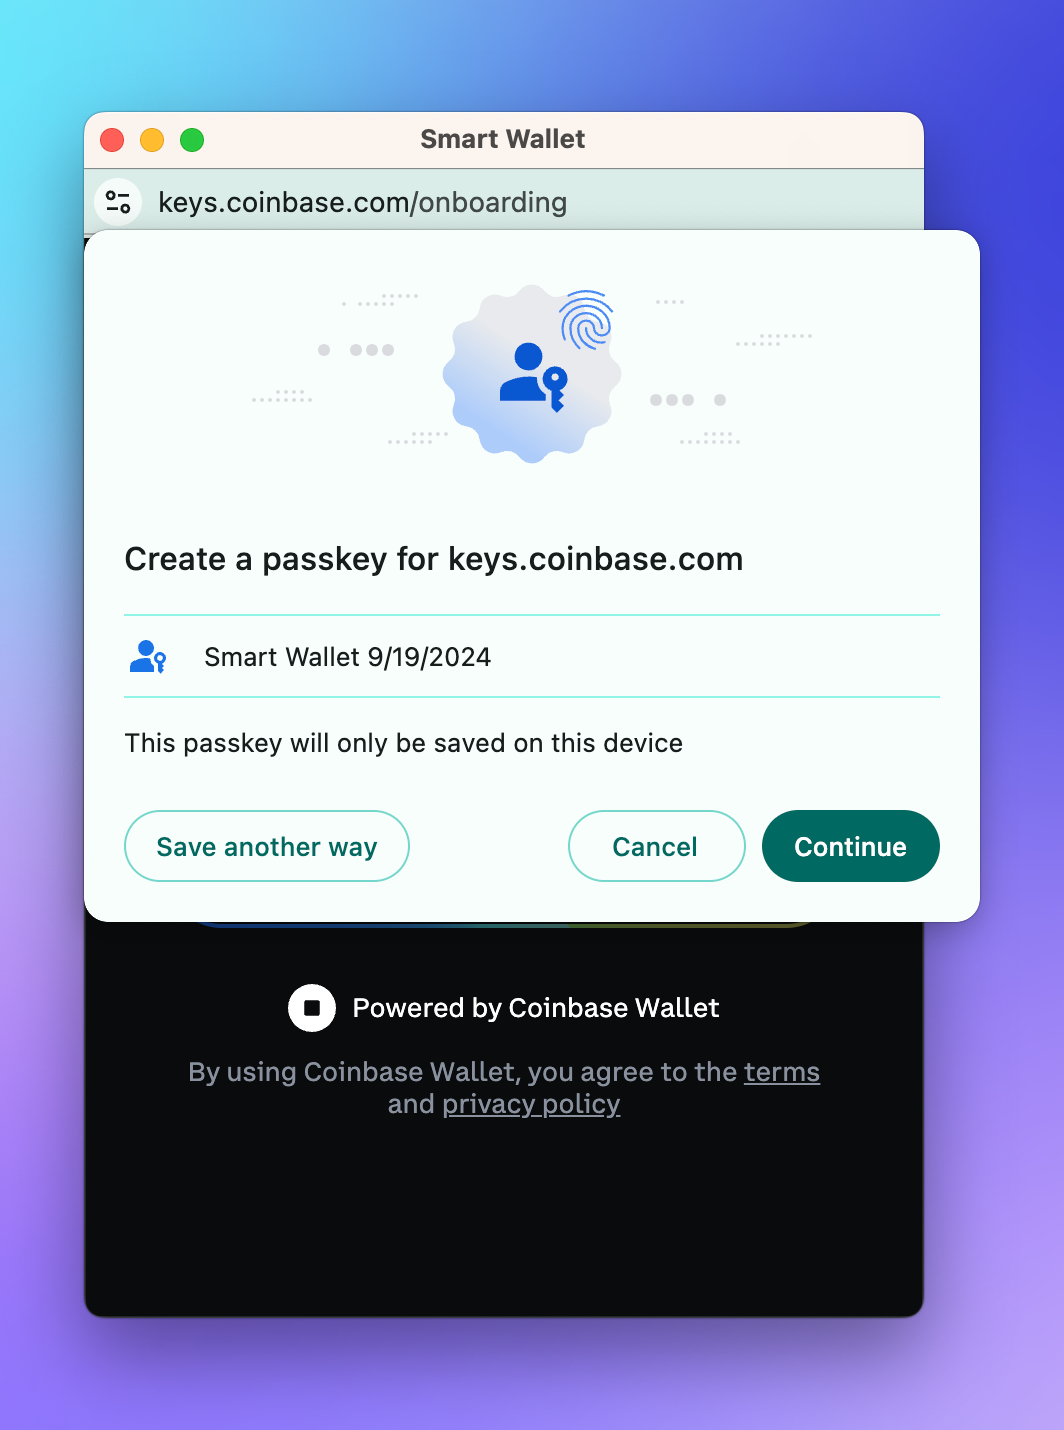
Aaand that’s it. Super quick and easy! My smart wallet is now ready to go.
Amazing. However... there’s a catch.
Did you catch the very important message in that screenshot? “This passkey will only be saved on this device.” Chrome profile passkeys will sync across Android devices, but are siloed on macOS. Google Password Manager is being expanded to address this, and other password managers can also be used to sidestep the issue.
As it stands, if my laptop gets bricked or stolen, I’m out of luck. I would have the same problem if I created the passkey with my YubiKey and then lost it. Either way, I would be locked out of the wallet completely.
While Coinbase is facilitating my whole experience here, and the passkey I’ve just created only works with coinbase.com — an important security feature, albeit one with drawbacks — Coinbase is not custodying the wallet for me. No passkey = no wallet access = no ability to withdraw funds or do anything else.
I can’t use this smart wallet on my phone at all, because Google Password Manager (which includes Chrome profile passkeys) currently does not support sync across Apple devices. Whereas if I had created the smart wallet on my phone, I would still be able to authenticate and access the smart wallet through my browser, by approving access on my phone. Likewise, cross-platform passkeys are enabled by password managers like iCloud Passwords / iCloud Keychain, Google Password Manager on Android, or 1Password.
Another nuance: the Chrome passkey I’ve just created will only work with my sonya@splits.org Chrome profile, not the one associated with my personal Google account. If I wasn’t already aware of this limitation, I’d be pretty annoyed to discover it by surprise. On the other hand, you can always just have a bunch of wallets. Butttt you gotta store the seed phrases to make sure you don’t get locked out.
That’s the next step. Coinbase makes it possible to further secure your smart wallet. Dive into the settings: gear icon in the top right corner → https://wallet.coinbase.com/settings/manage-wallets → select “Smart Wallet” → https://keys.coinbase.com/settings → select “Account recovery” —> https://keys.coinbase.com/settings/account-recovery → generate a recovery key:
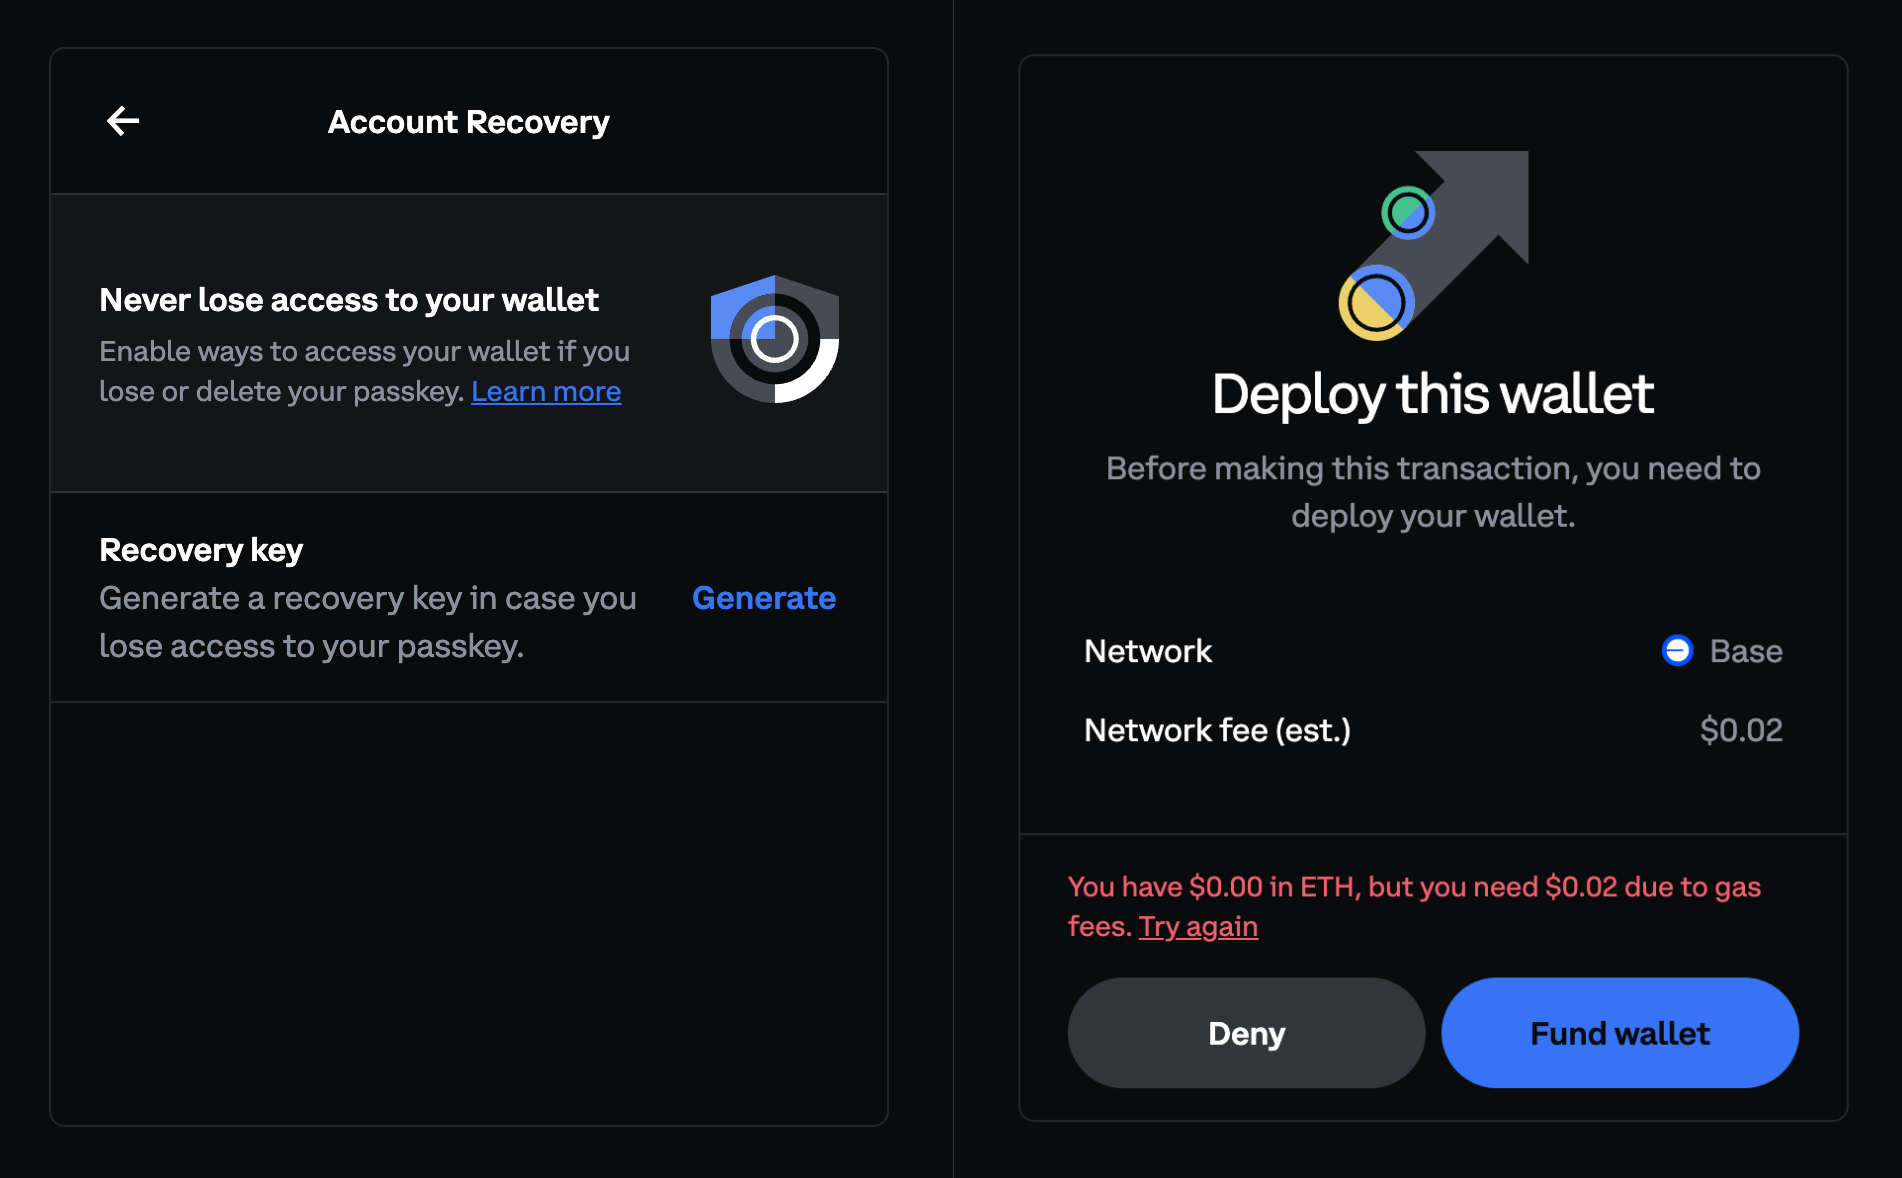
Click on “Generate.” The next step is deploying the wallet, which means I need to fund it.
Selecting “Fund wallet” takes me to Coinbase Onramp. Instead I sent some Base ETH from my daily driver wallet. Okay, now let’s try that again.
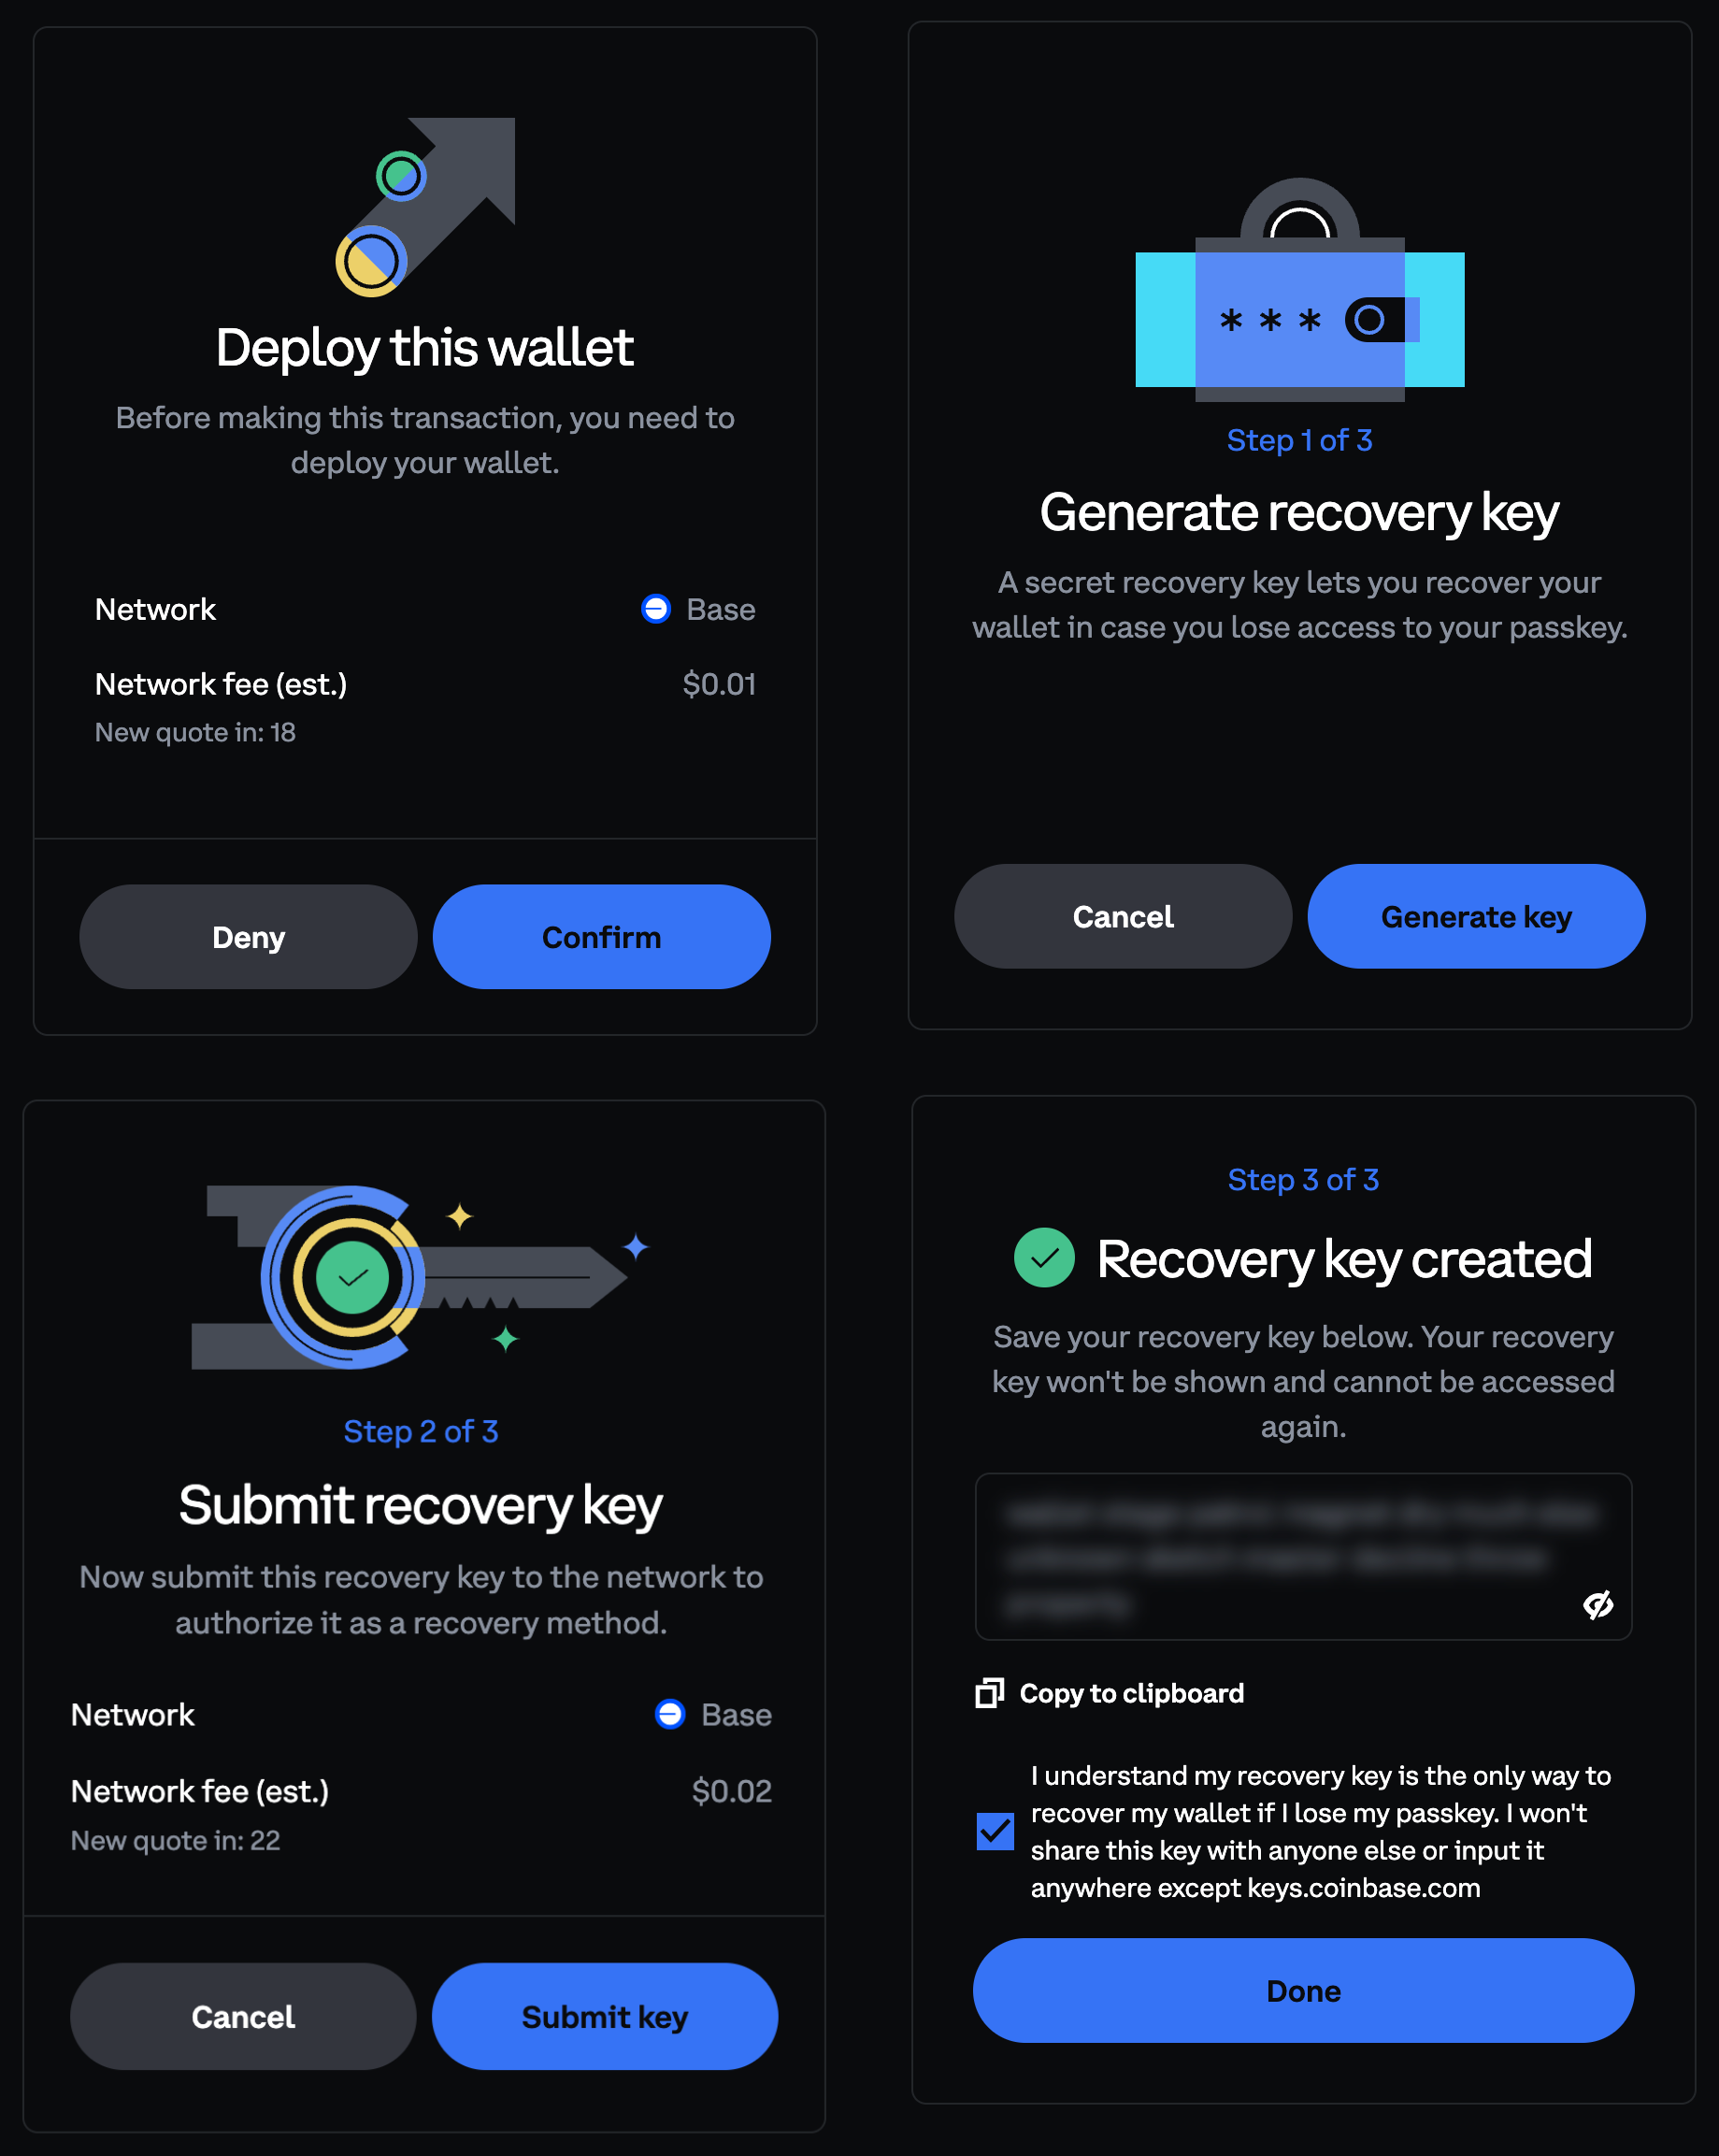
The recovery key is not actually the seed phrase for the smart wallet. Here’s how Coinbase has set things up:
Smart wallet allows you to set up a recovery key to prevent lost access to a passkey either through deletion or device loss (in case of a hardware, Chrome profile or Windows Hello based passkey). This recovery key generates a new signer onchain that can add a new passkey and recover your wallet in the event of an emergency.
In terms of storing the information, however, we can treat the recovery key like a seed phrase. I’m not going to do anything important with this random test wallet so I threw it in my password manager. If this were an important wallet, I would need to take the steps discussed in our last post.
Essentials
Time to review. Keep your passkey-based smart wallet safe by paying attention to:
- Where the passkey is actually stored. If it’s a device, set up biometrics and a password to gate access. If you’re using a hardware key, have a designated spot for it and make a habit of always returning it to that spot. Lock down your password manager using whatever account security options are available.
- Storing the recovery key (or seed phrase, as may be the case with other smart wallet products). Follow Phil Mohun’s advice.
The ideal would be to have multiple passkeys, even in addition to the recovery key. If your smart wallet can be accessed with both your phone passkey and a YubiKey, for example, then it’s less of an issue if you lose one of those. Coinbase Smart Wallet is not set up for this yet, but the feature is supported at the contract level.
Our thanks to Wilson Cusack from Coinbase for reviewing this post before publication.